扩展是什么
Extensions are small software programs. They are built on web technologies such as HTML, JavaScript, and CSS.
根据官方文档的描述,chrome扩展是一种基于web技术的增强程序。当然也可以通过c++编写的dll实现一些更加复杂的功能。
为什么需要扩展
- 浏览器级别的长生命周期,常驻后台监听各类数据
- 执行一些高权限敏感操作,例如注入JS,样式,不受跨域策略限制的发起网络请求
- 通过devtools提供的API实现React tools一类的开发者工具
- 拥有独立的弹窗或弹层已经消息通信机制,与用户进行各种交互,例如google自家的翻译、Gmail等
- …
开发扩展的工具&环境
NOTHING!
只要你喜欢,记事本都行。
Hello Extensions
/Demo/manifest.json
1
2
3
4
5
6
|
{
    "name": "Hello Extensions",
    "description" : "Base Level Extension",
    "version": "1.0",
    "manifest_version": 2
}
|
完整配置项可以参考官方文档。
根目录下只有manifest.json是必须的,其他HTML,JS都是可选的。
扩展UI的组成部分
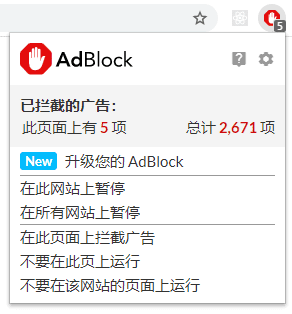
右上角图标(browserAction)
browserAction和pageAction是浏览器右上角区域的图标,包含Icon、角标和点击后的弹窗,pageAction顾名思义是特化的browserAction,只在特定情况下生效(点亮):


地址栏关键词(Omnibox)

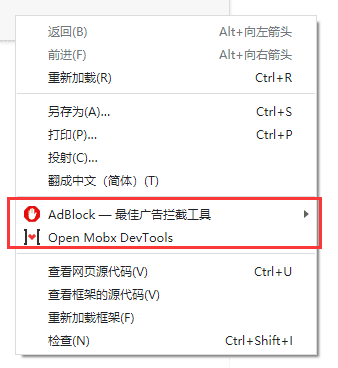
响应命令(Commands)
在background.js中监听某些预定义的按键组合,从而执行特定代码,也可以用来调起弹窗,没有GUI
 1
 2
 3
 4
 5
 6
 7
 8
 9
10
11
|
// manifest.json

"commands": {
    "_execute_browser_action": {
      "suggested_key": {
        "default": "Ctrl+Shift+F",
        "mac": "MacCtrl+Shift+F"
      },
      "description": "Opens hello.html"
    }
  }
|
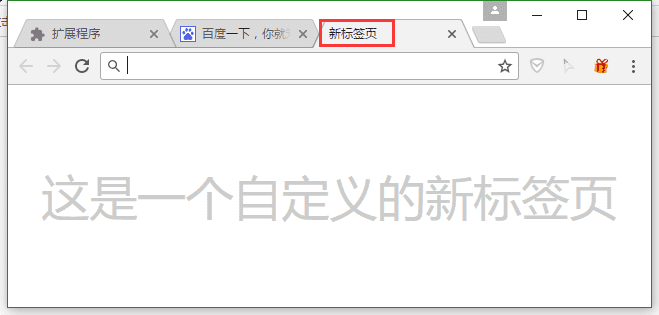
劫持页面(Override Pages)
可替换chrome默认的特殊页面,例如历史记录,新标签页等,下图替换了新标签页:
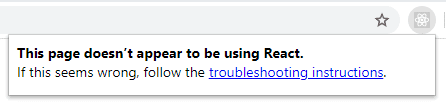
我们熟悉的React Devtools正是这种形式:

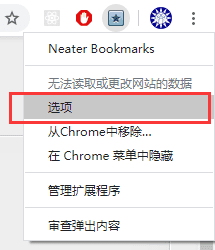
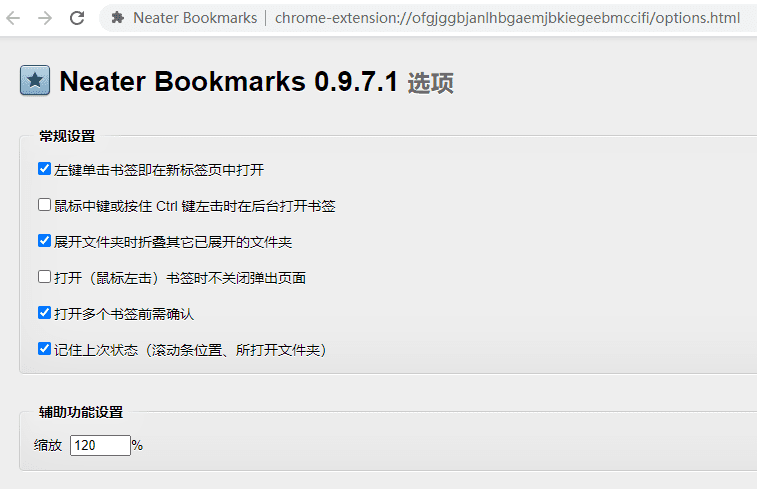
选项页(Options Page)
一种专门用来进行扩展配置的页面,新版Chrome允许非全屏配置页
扩展脚本的类型
后台脚本(Background Script)
Extensions are event based programs used to modify or enhance the Chrome browsing experience.
Extensions monitor these events in their background script
扩展是事件驱动的,后台脚本生命周期最长,从浏览器启动直到关闭都在后台监听。区别于内容页脚本,它无法访问DOM也没有上下文环境。(注)这非常像Web Worker或者Electron中的主线程。
后台脚本的生命周期和事件处理流程可以参考官方文档 Manage Events with Background Scripts
这里注意区分一个概念,在很多扩展开发教程或文档中,会提到background page,也就是扩展面板里的”背景页“:
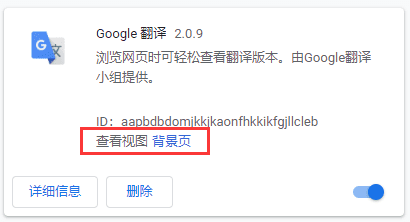 看起来它似乎是后台脚本所对应的HTML页面,而且经过测试会发现,后台脚本确实可以访问这个”页面“的DOM。既然如此为什么上文又说它不能访问DOM也没有上下文环境呢?
我们回头看看后台脚本的配置方式:
 1
 2
 3
 4
 5
 6
 7
 8
 9
10
11
12
13
14
15
|
// 方式1:
// manifest.json
"background": {
    "persistent": false,
    "scripts": [ "background.js"]
}

// 方式2:
// manifest.json
"background": {
    "persistent": false,
    "page": "background.html"
}
// background.html
<script src="background.js"></script>
|
这两种后台脚本的加载方式其实是互斥的,也就是说背景页只是一个承载后台脚本的容器,方便调用Devtools审查元素、console等等面板协助开发,仅此而已。所以即便这个DOM环境存在,你也不应该使用它。
内容页脚本(Content scripts)
Content scripts are files that run in the context of web pages. By using the standard Document Object Model (DOM), they are able to read details of the web pages the browser visits, make changes to them and pass information to their parent extension.
类似普通网页中的JS,内容页脚本运行在扩展页面的上下文环境中,能访问当前页面的DOM。类似的,它很像Electron的渲染线程,专职处理UI相关事务。
注入脚本(Inject Scripts)
注入脚本属于一种特殊的内容页脚本,可以通过某些方式注入到页面的上下文环境中。
程序注入(Inject Programmatically)
注入一段代码:
1
2
3
4
5
6
7
8
|
chrome.runtime.onMessage.addListener(
    function(message, callback) {
      if (message == “changeColor”){
        chrome.tabs.executeScript({
          code: 'document.body.style.backgroundColor="orange"'
        });
      }
   });
|
注入一个js文件:
1
2
3
4
5
6
7
8
|
chrome.runtime.onMessage.addListener(
    function(message, callback) {
      if (message == “runContentScript”){
        chrome.tabs.executeScript({
          file: 'contentScript.js'
        });
      }
   });
|
声明注入(Inject Declaratively)
在匹配命中的网页中注入代码:
 1
 2
 3
 4
 5
 6
 7
 8
 9
10
11
12
13
|
// manifest.json
{
 "name": "My extension",
 ...
 "content_scripts": [
   {
     "matches": ["http://*.domain.com/*"],
     "css": ["myStyles.css"],
     "js": ["contentScript.js"]
   }
 ],
 ...
}
|
扩展的通信/消息机制
由于扩展内经常同时存在多种上下文迥异的js,很多时候需要通过某种机制在这些js之间进行通信,chrome也提供了专门的API:
单次消息(Simple one-time requests)
当你只需要发送一些简单的消息,你可以使用runtime.sendMessage或者tabs.sendMessage发送一些JSON格式的消息:
1
2
3
|
chrome.runtime.sendMessage({greeting: "hello"}, function(response) {
  console.log(response.farewell);
});
|
如果你需要定向的把消息发送到指定tab的内容页脚本,例如当前页:
1
2
3
4
5
|
chrome.tabs.query({active: true, currentWindow: true}, function(tabs) {
  chrome.tabs.sendMessage(tabs[0].id, {greeting: "hello"}, function(response) {
    console.log(response.farewell);
  });
});
|
在接收端,runtime.onMessage上注册监听即可接收/回复消息:
1
2
3
4
5
6
7
8
|
chrome.runtime.onMessage.addListener(
  function(request, sender, sendResponse) {
    console.log(sender.tab ?
                "from a content script:" + sender.tab.url :
                "from the extension");
    if (request.greeting == "hello")
      sendResponse({farewell: "goodbye"});
  });
|
值得注意的是,如果你在多个内容页脚本中监听同一个消息,只有第一个调用sendResponse的地方能成功回复,之后的调用将会被忽略。
长连接消息(Long-lived connections)
上文中提到的单次消息类似HTTP的“请求/响应”模式,而长连接消息则类似socket,建立channel后双方都可以监听/发送消息,比较常见的一类场景是:扩展需要读取用户在某个页面上的输入,以此提供一些额外提示。
1
2
3
4
5
6
7
8
|
const port = chrome.runtime.connect({ name: "channel_123" });
port.postMessage({joke: "Knock knock"});
port.onMessage.addListener(function(msg) {
  if (msg.question == "Who's there?")
    port.postMessage({answer: "Madame"});
  else if (msg.question == "Madame who?")
    port.postMessage({answer: "Madame... Bovary"});
});
|
接收端需要注册onConnect来监听channel建立过程:
 1
 2
 3
 4
 5
 6
 7
 8
 9
10
11
12
|
chrome.runtime.onConnect.addListener(function(port) {
  // 这里可以通过name判断需要监听的channel
  console.assert(port.name == "channel_123");
  port.onMessage.addListener(function(msg) {
    if (msg.joke == "Knock knock")
      port.postMessage({question: "Who's there?"});
    else if (msg.answer == "Madame")
      port.postMessage({question: "Madame who?"});
    else if (msg.answer == "Madame... Bovary")
      port.postMessage({question: "I don't get it."});
  });
});
|
跨扩展消息(Cross-extension messaging)
单次消息和长连接消息也有用法几乎相同的跨扩展API:
 1
 2
 3
 4
 5
 6
 7
 8
 9
10
11
12
13
14
15
16
17
18
19
|
// For simple requests:
chrome.runtime.onMessageExternal.addListener(
  function(request, sender, sendResponse) {
    if (sender.id == blocklistedExtension)
      return;  // don't allow this extension access
    else if (request.getTargetData)
      sendResponse({targetData: targetData});
    else if (request.activateLasers) {
      var success = activateLasers();
      sendResponse({activateLasers: success});
    }
  });

// For long-lived connections:
chrome.runtime.onConnectExternal.addListener(function(port) {
  port.onMessage.addListener(function(msg) {
    // See other examples for sample onMessage handlers.
  });
});
|
 1
 2
 3
 4
 5
 6
 7
 8
 9
10
11
12
13
|
// The ID of the extension we want to talk to.
var laserExtensionId = "abcdefghijklmnoabcdefhijklmnoabc";

// Make a simple request:
chrome.runtime.sendMessage(laserExtensionId, {getTargetData: true},
  function(response) {
    if (targetInRange(response.targetData))
      chrome.runtime.sendMessage(laserExtensionId, {activateLasers: true});
  });

// Start a long-running conversation:
var port = chrome.runtime.connect(laserExtensionId);
port.postMessage(...);
|
扩展的数据存储
在扩展中HTML5 Storage API同样是可用的,这里主要介绍chrome提供用于存储扩展设置的APIchrome.storage:
相较于通过接口或者其他方式实现的存储,chrome.storage优势主要有:
- 存储于其中的数据能跟随用户当前登陆的google账号同步到云端(通过
storage.sync)
- 多种脚本都能直接访问不需要借助后台脚本
- 能直接存储js对象,性能更高(
HTML5 Storage API则需要序列化)
使用前需要在Manifest中申请权限:
1
|
"permissions": ["storage"],
|
读取和写入都非常简单:
1
2
3
4
5
6
7
|
chrome.storage.sync.set({key: value}, function() {
  console.log('Value is set to ' + value);
});

chrome.storage.sync.get(['key'], function(result) {
  console.log('Value currently is ' + result.key);
});
|
如果你不想同步到用户账户里只想做本机的存储可以使用storage.local:
1
2
3
4
5
6
7
|
chrome.storage.local.set({key: value}, function() {
  console.log('Value is set to ' + value);
});

chrome.storage.local.get(['key'], function(result) {
  console.log('Value currently is ' + result.key);
});
|
网络请求劫持
通过webRequest API可以实现任意页面任意请求的拦截和修改,该API的全生命周期如下:
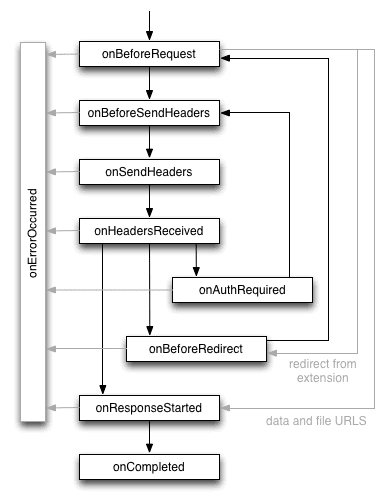
一个简单的拦截请求Demo:
1
2
3
4
5
|
chrome.webRequest.onBeforeRequest.addListener(function(details) {
   return {cancel: details.url.indexOf("://www.block.com/") != -1};
},
{urls: ["<all_urls>"]},
["blocking"]);
|
所有url中包含www.block.com域名的请求都会被直接拦截。
实战
这里用工作中遇到的一个真实案例来演示:
问题来源
一些项目的鉴权方式依赖登录站点的set-cookie,导致开发模式下(localhost)无法访问live环境接口,调试极为不便。
解决思路
想到可以“拷贝”登录所需的cookie到localhost下通过鉴权,所以实现监听set-cookie的写入操作并同步写入到localhost即可。
具体实现
可以想到需要的部件
- 设置弹窗:设置监听哪些域下的cookie
- 后台脚本:监听cookie变化并写入到指定域名
- 通知弹窗:通知用户当前监听的域名
manifest.json
 1
 2
 3
 4
 5
 6
 7
 8
 9
10
11
12
13
14
15
16
17
18
19
|
{
  "name": "Auto Sync Cookie",
  "description": "listen and sync Cookie to target domain.",
  "version": "0.1",
  "manifest_version": 2,
  "permissions": ["storage", "cookies", "<all_urls>", "notifications"],
  // 申请所需的权限:存储,cookie,通知
  "icons": { "16": "icon.png", "48": "icon.png", "128": "icon.png" },
  // 定义了一个弹窗popup.html
  "browser_action": {
      "default_title": "Listen & Sync Cookie to target domain.",
      "default_icon": "icon.png",
      "default_popup": "popup.html"
  },
  // 定义了一个后台脚本background.js
  "background": {
    "scripts": ["background.js"]
  }
}
|
background.js
 1
 2
 3
 4
 5
 6
 7
 8
 9
10
11
12
13
14
15
16
17
18
19
20
21
22
23
24
25
26
27
28
29
30
31
32
33
34
35
36
37
38
39
40
41
42
|
// 存储设置
const config = {
    listenDomain: [],
    syncURL: ''
}

// 从chrome.storage获取初值(似乎要发布到商店上才能看到云同步效果)
chrome.storage.sync.get(['listenDomain', 'syncURL'], ({ listenDomain = [], syncURL = '' }) => {
    config.listenDomain = listenDomain
    config.syncURL = syncURL
})

// 从弹窗更新了设置后同步最新设置项
chrome.storage.onChanged.addListener(function({ listenDomain, syncURL }) {
    if (listenDomain) {
        config.listenDomain = listenDomain.newValue
    }
    if (syncURL) {
        config.syncURL = syncURL.newValue
    }

    // 发出通知
    chrome.notifications.create(null, {
        type: 'basic',
        iconUrl: 'icon.png',
        title: 'Setting Successfully',
        message: `Now Listening: ${config.listenDomain.join(', ')}`,
    })
})

// 监听cookie变化并写入syncURL
chrome.cookies.onChanged.addListener(function(info) {
    const {cause, cookie: {domain, name, path, value}, removed} = info
    if(config.listenDomain.includes(domain) && removed === false && cause === 'explicit') {
        chrome.cookies.set({
            url: config.syncURL,
            name,
            value,
            path,
        }, msg => console.log('sync success:', msg))
    }
})
|
 1
 2
 3
 4
 5
 6
 7
 8
 9
10
11
12
13
14
15
16
17
18
19
20
21
22
23
24
25
|
<!DOCTYPE html>
<html lang="en">
<head>
  <meta charset="UTF-8">
  <title>Setting</title>
  <style>
  /** 样式 **/
  </style>
</head>
<body>
<div class="setting-box">
  <label>
    Listen Domains
    <textarea id="listen-domain" placeholder="domain.com (support multi-line)"></textarea>
  </label>
  <label>
    Sync URL
    <input type="text" id="sync-url" placeholder="http://localhost">
  </label>
  <button class="btn" type="button" id="save-btn">Sync</button>
</div>
/** 弹窗的内容页脚本引入 **/
<script src="popup.js"></script>
</body>
</html>
|
 1
 2
 3
 4
 5
 6
 7
 8
 9
10
11
12
13
14
15
16
17
18
19
20
21
22
23
24
25
|
// 页面dom加载完后再执行
document.addEventListener('DOMContentLoaded', function(){
  const ls = document.querySelector('#listen-domain')
  const sy = document.querySelector('#sync-url')
  const syncBtn = document.querySelector('#save-btn')

  // 回填保存的设置值
  chrome.storage.sync.get(
      ['listenDomain', 'syncURL'],
      ({ listenDomain = [], syncURL = '' }) => {
        ls.value = listenDomain.join('\n')
        sy.value = syncURL
      }
  )

  // 保存新的设置值
  syncBtn.onclick = () => {
    const listenDomain = ls.value.trim().split(/\n/)
    const syncURL = sy.value.trim()
    if (listenDomain && syncURL) {
      chrome.storage.sync.set({ listenDomain, syncURL })
    }
  }

})
|